How It Works
Complete step-by-step guide to using JustInvoice with visual screenshots
Dashboard Overview
When you first log in, you'll see your dashboard with a comprehensive overview of all your invoices. The dashboard shows key metrics, recent activity, and quick access to important functions.
- View invoice statistics and totals
- See recent invoice activity
- Quick access to create new invoices
- Monitor payment status at a glance
- Click a section title to expand/collapse
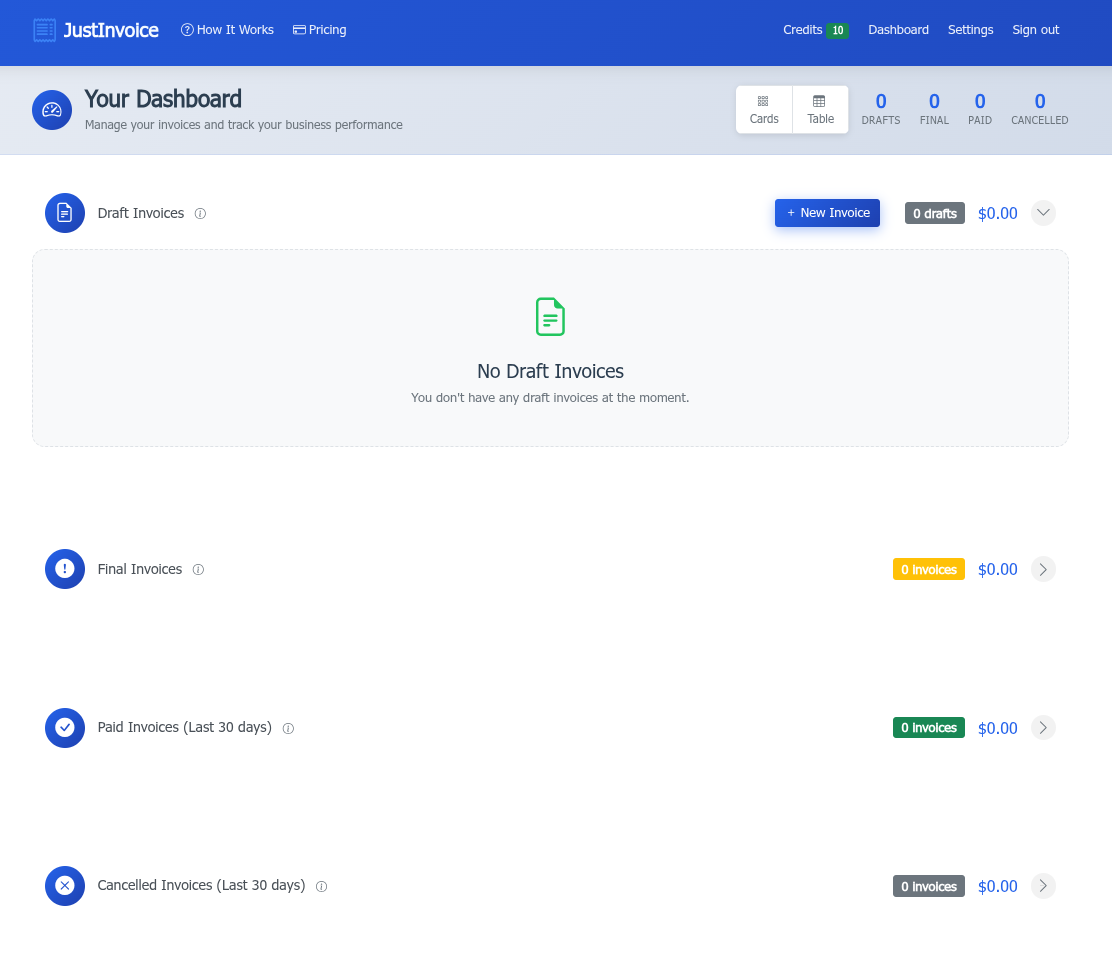
Screenshot: Dashboard Overview
Create an Invoice
Creating invoices is simple with our intuitive invoice builder. Fill in customer details, add line items, and add customer notes.
- Enter customer information
- Add line items with descriptions and amounts
- Add customer notes
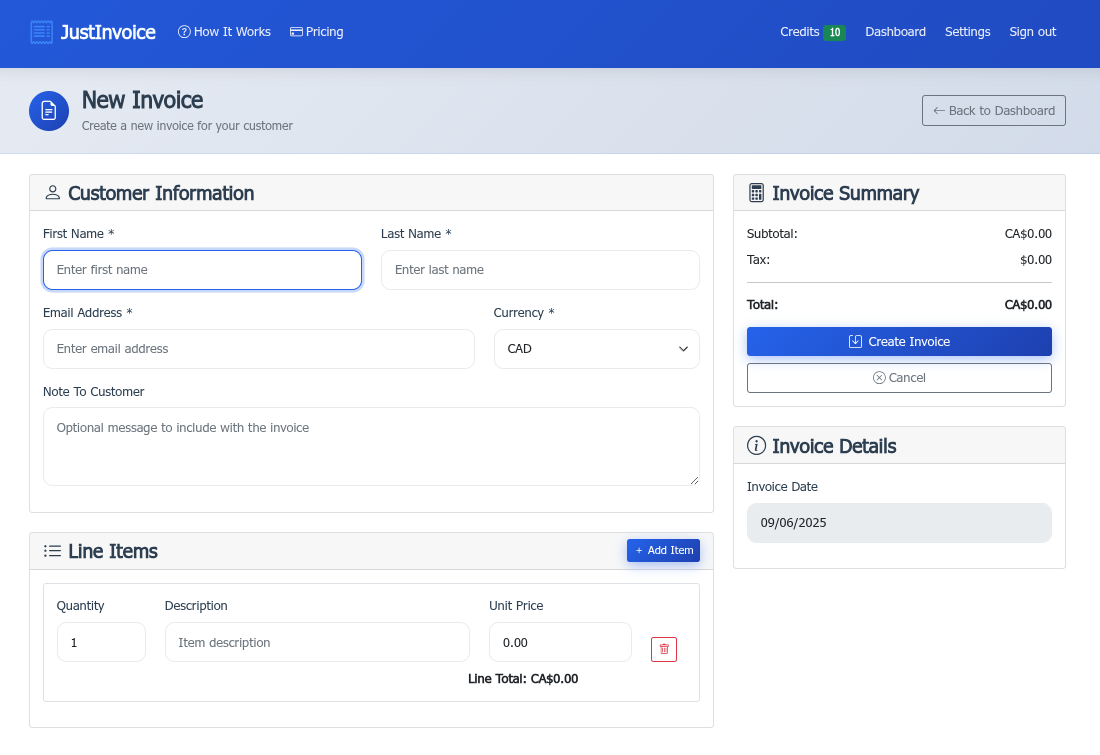
Screenshot: Create Invoice Form
Dashboard Card and Table Views
Your dashboard offers multiple ways to view and manage your invoices. Switch between card view for visual overview and table view for detailed information.
- Card view for visual invoice management
- Table view for detailed data analysis
- Quick actions on individual invoices including:
- Edit Invoice
- Preview Invoice
- Mark as Final
- Resend Invoice
- Mark as Paid
- Mark as Cancelled
- Delete Invoice
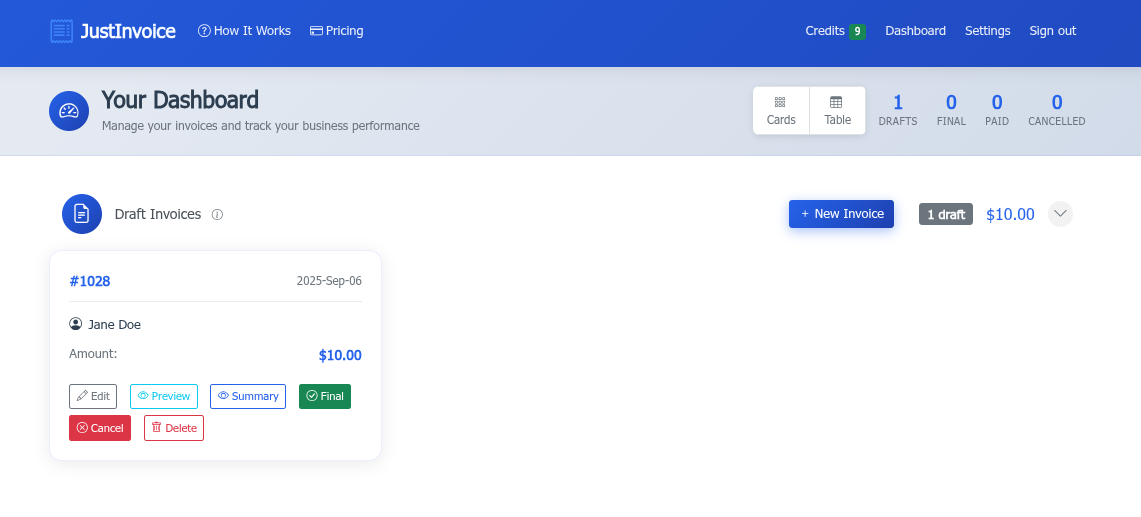
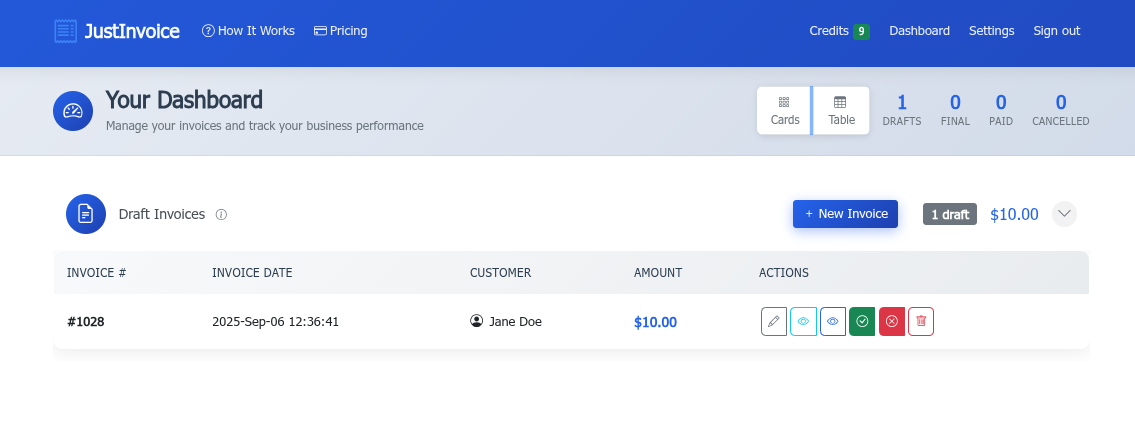
Screenshot: Dashboard Views
Previewing an Invoice
Before sending an invoice to your customer, preview how it will look. The preview shows exactly what your customer will see, including formatting and branding.
- See exactly how the invoice will appear
- Check formatting and calculations
- Verify customer information
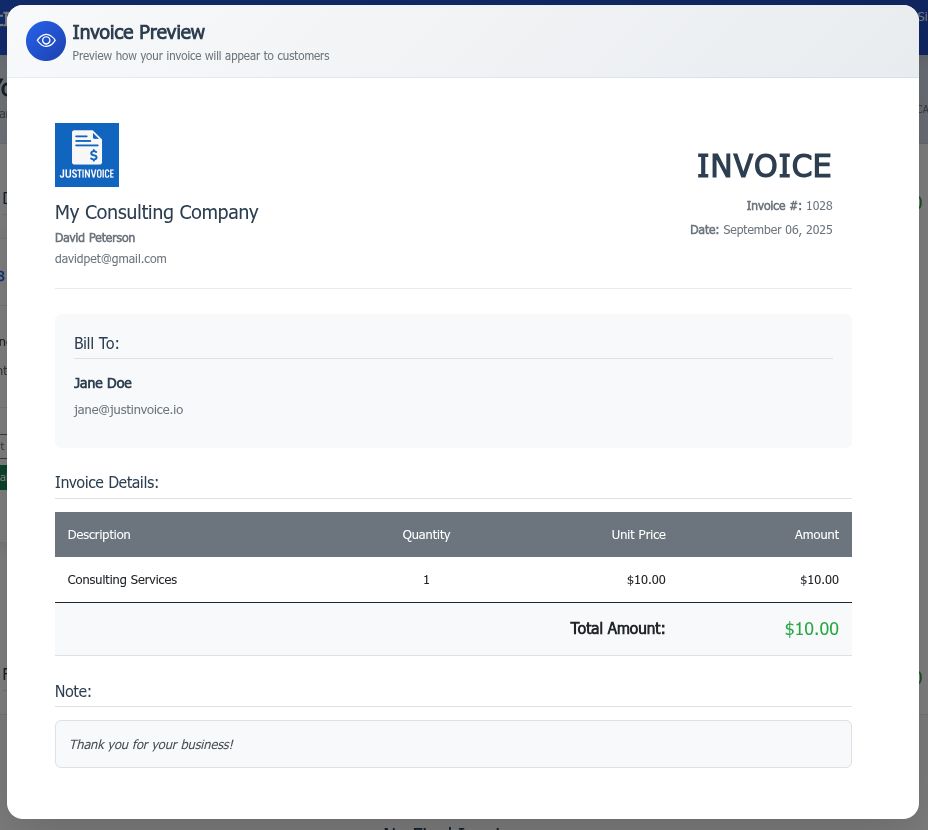
Screenshot: Invoice Preview
Mark Invoice Final Confirmation
When you're satisfied with the invoice preview, mark it as final. This action sends the invoice to your customer and makes it live for payment processing.
- Final summary review before sending
- Confirmation dialog for safety
- Automatic email to customer
- Payment link activation
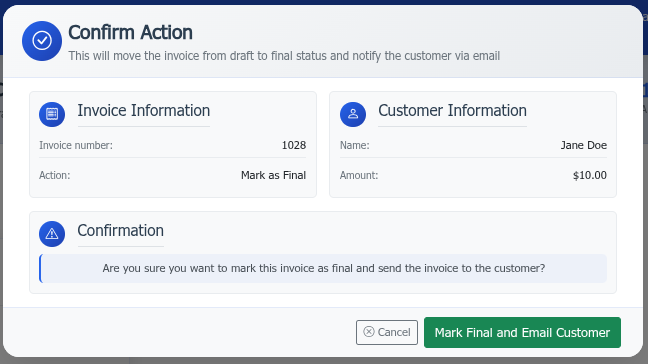
Screenshot: Final Confirmation Dialog
Invoice Summary
After marking an invoice as final, view the complete invoice summary. This includes all details, payment status, customer interactions, and activity logs.
- Complete invoice details
- Payment status tracking
- Customer interaction history
- Email Reminders status
- Activity and audit logs
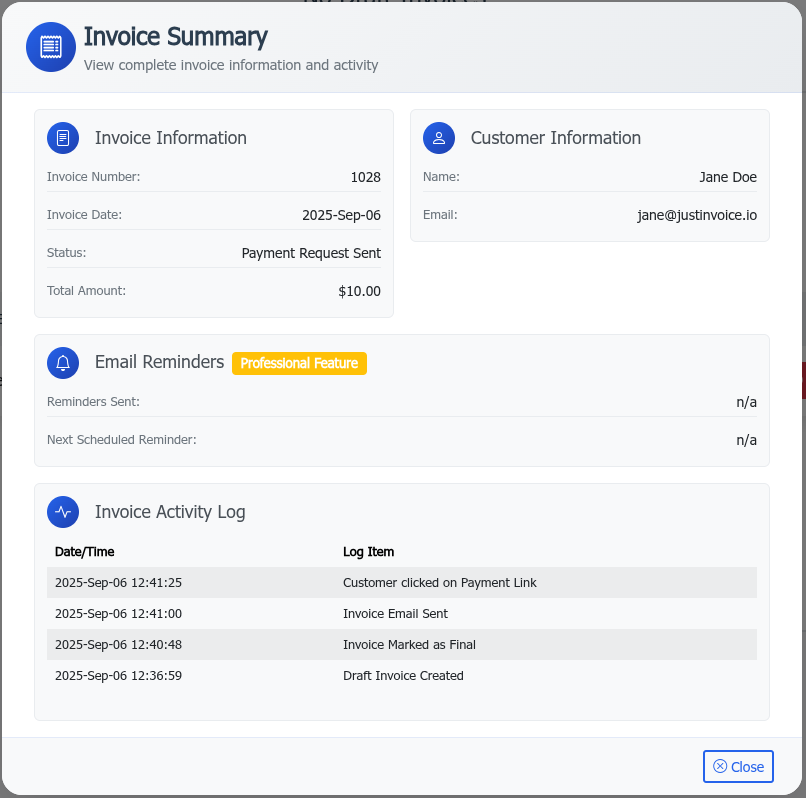
Screenshot: Invoice Summary
Settings - Profile
Configure your business profile information that appears on invoices. This includes your company details, contact information, and branding preferences.
- Company name and address
- Contact information
- Logo and branding
- Default currency
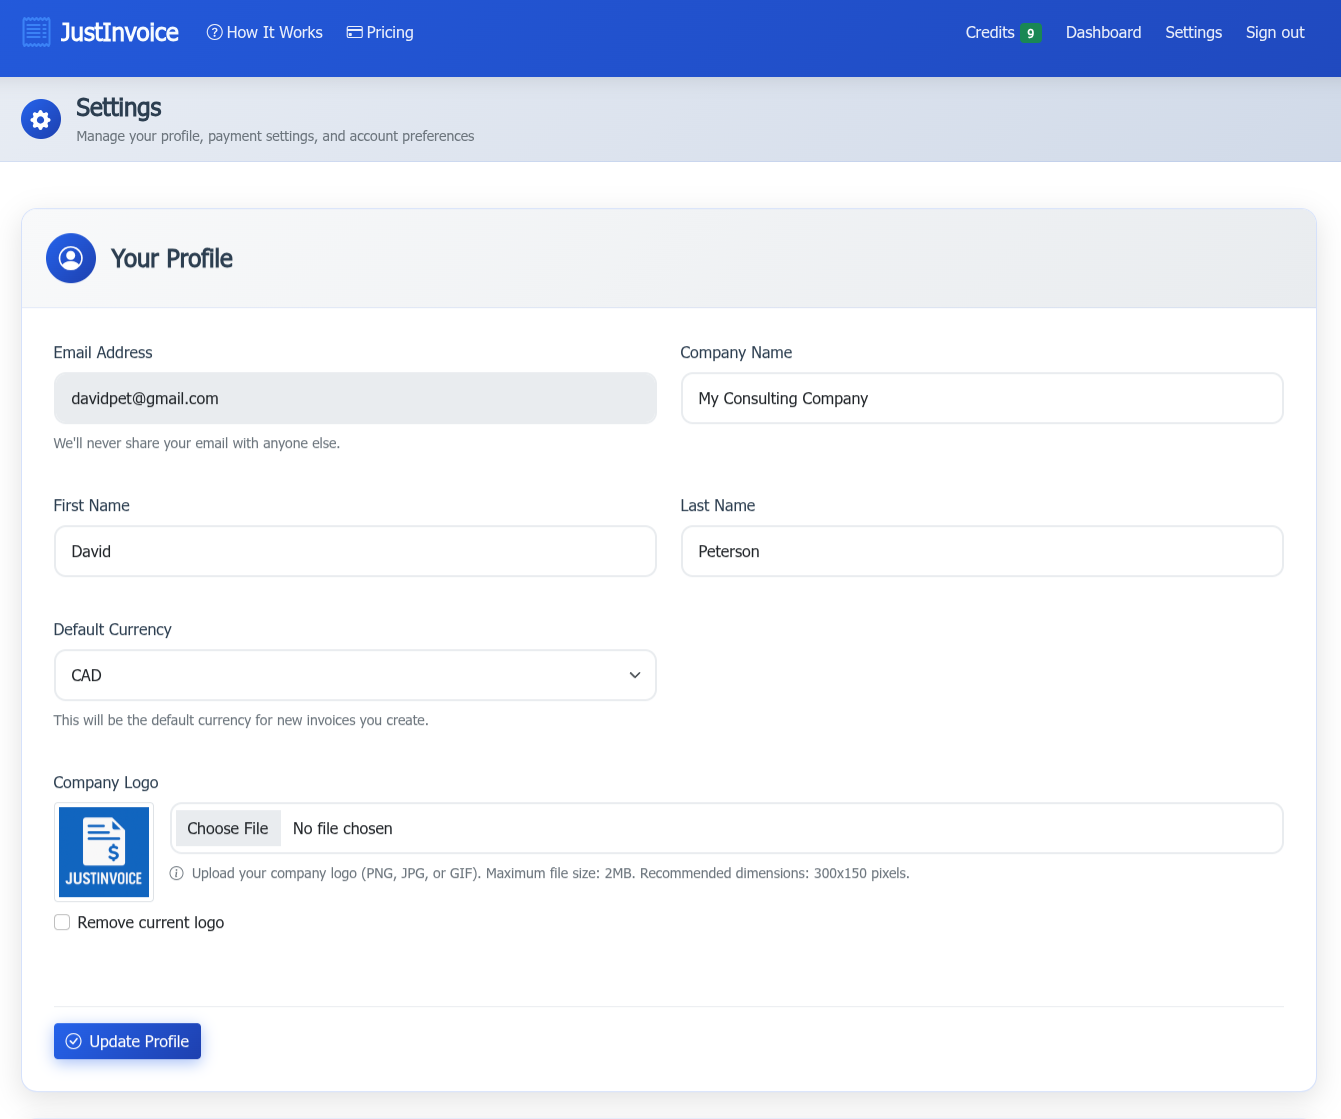
Screenshot: Profile Settings
Settings - Email Settings
Customize email templates and notification settings. Configure how invoices are sent to customers and what notifications you receive.
- Email template customization
- Notification preferences
- Reminder email settings
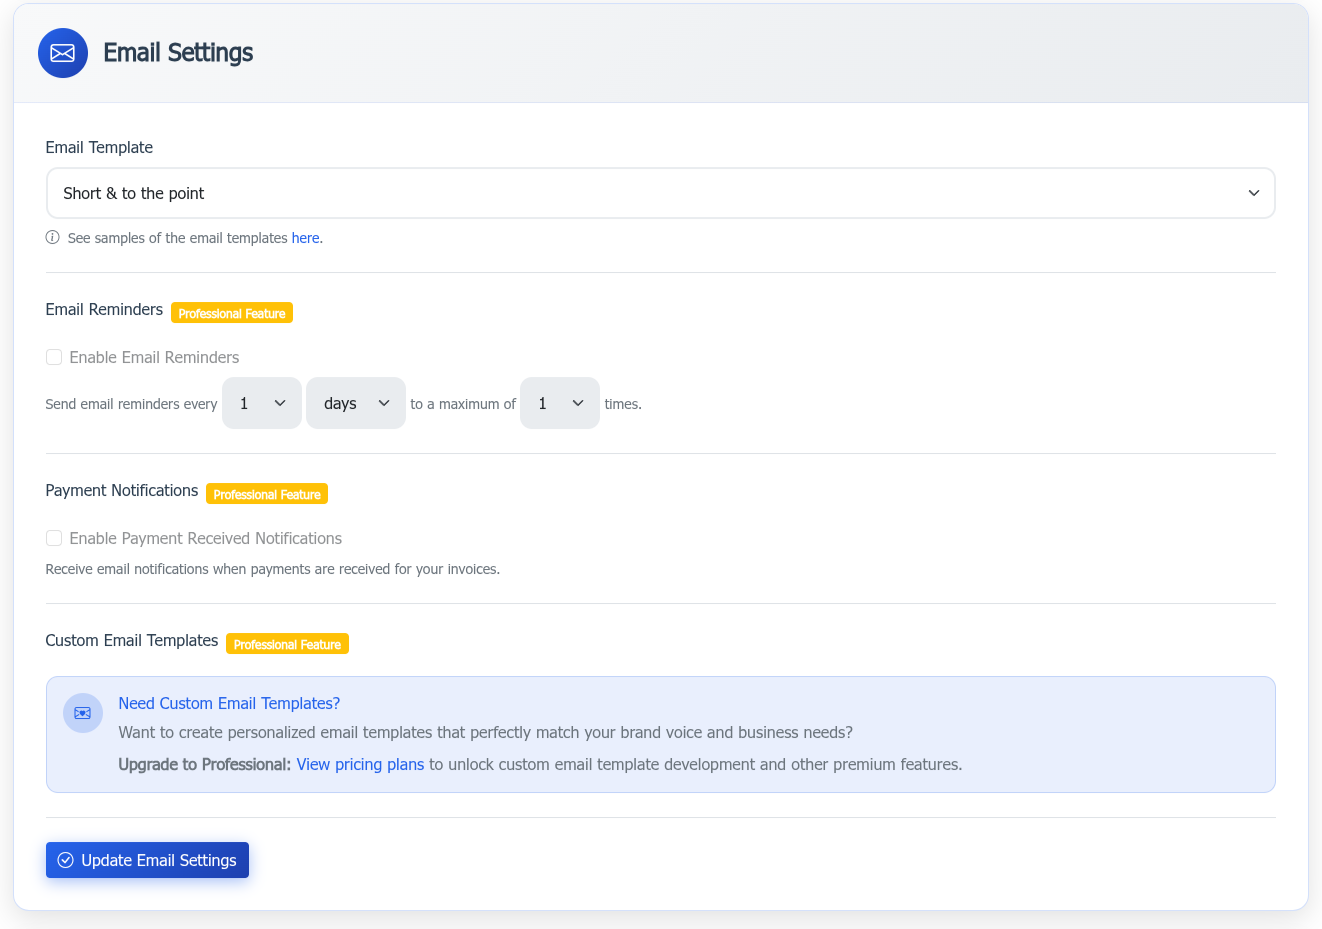
Screenshot: Email Settings
Settings - Payment Provider
Connect your payment provider (Stripe or Square) to enable automatic payment processing. This is a one-time setup that enables secure payment links on all invoices. Optionally, you can set up manual payment processing and you control when to mark invoice as paid or cancelled.
- Connect Stripe or Square account
- Configure payment settings
- Manual payment instructions
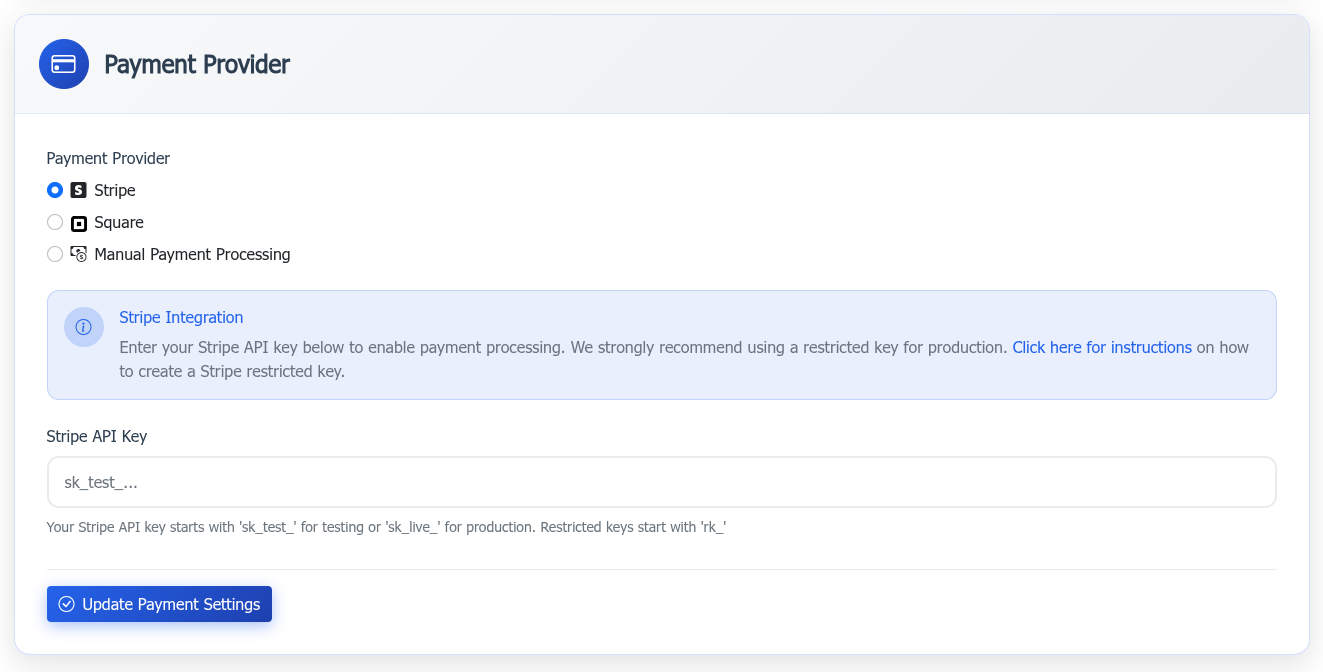
Screenshot: Payment Provider Settings
Settings - API Key
Generate and manage your API key for programmatic access to JustInvoice. Use the API key to integrate with Zapier, custom applications, or other automation tools.
- Regenerate new API key
- View existing key
- View a sample CURL command line example to add a new invoice
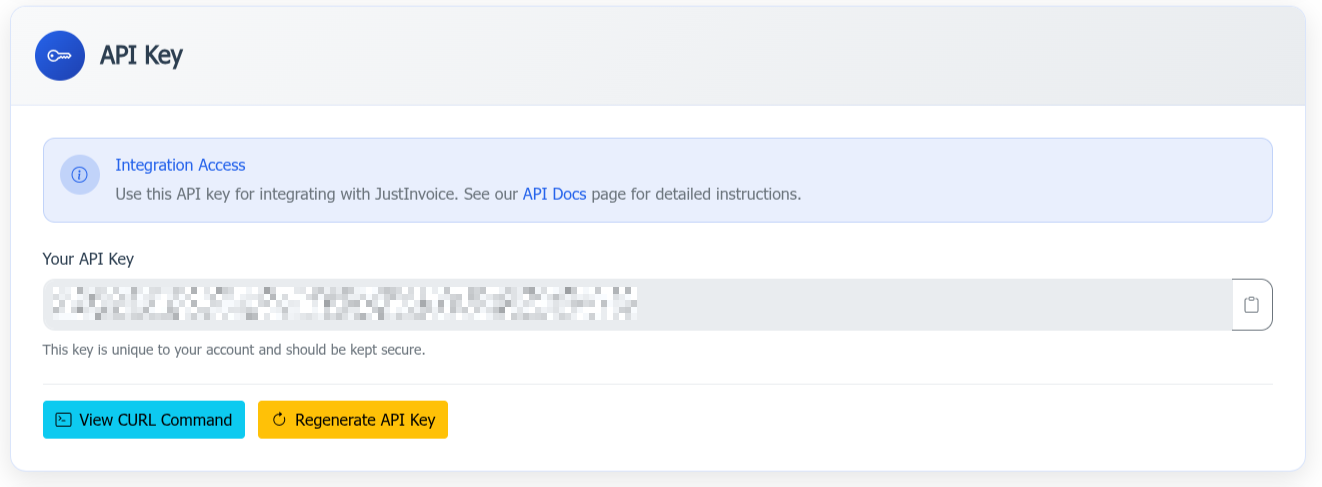
Screenshot: API Key Settings
Settings - Manage Subscription
View and manage your JustInvoice subscription. Upgrade or downgrade your plan, view billing history, and manage payment methods.
- View current plan details
- Upgrade or downgrade plans
- View billing history
- Manage payment methods
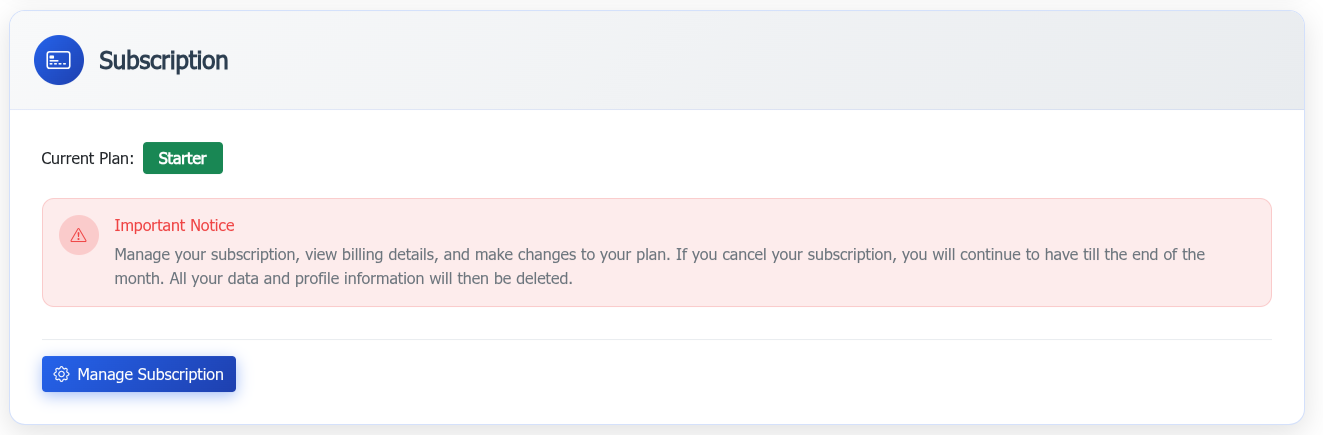
Screenshot: Subscription Management
Ready to Get Started?
Now that you understand the workflow, create your first invoice and start managing your business more efficiently.